2. Configuring Protected Branches in GitLab
2.1 Setting Up Protected Branches
- Navigate to Project Settings:
- Go to your project in GitLab.
- Click on
Settings>Repository.
- Add a Protected Branch:
- Scroll down to the
Protected branchessection. - Select the branch you want to protect (e.g.,
main). - Configure the protection settings:
- Allowed to Merge: Specify roles or users who can merge to this branch.
- Allowed to Push and Merge: Specify roles or users who can push to this branch.
- Allowed to Force Push: Specify roles or users who can force push to this branch (usually discouraged).
- Click
Protectto apply the settings.
- Scroll down to the
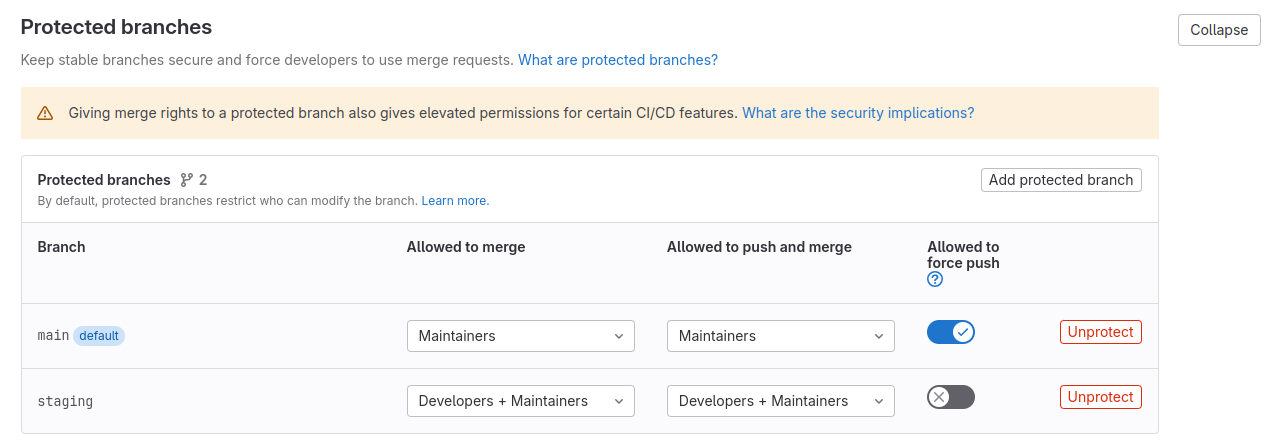
Example Configuration
Branch: main
- Allowed to Merge: Maintainers
- Allowed to Push: Developers + Maintainers
- Allowed to Force Push: No one
2.3 Removing Branch Protection
- In the
Protected Branchessection, find the branch you want to unprotect - Click the
Unprotectbutton next to it